
A Goofy Movie
Culinary Movie Night Guide
Difficulty Level: Medium

Table of Contents
Equipment
Here is a list (with links) of all the equipment and decorations I used for my Goofy Movie Culinary Movie Night. I would be incredibly grateful if you used my links. I will make a little commission, and that would really help with the cost of the website and related expenses. You can find my full Amazon List here!
- 90’s Confetti- Click Here for Link
- Miniature Fishing Poles- Click Here for Link
- Purple Lights- Click Here for Link
- Bubbles- Click Here for Link
Tips
- Personalizing the Menu– When planning your menu for your movie night, don’t feel pressured to serve exactly what I chose to serve. Feel free to remove/add/replace dishes so it makes sense for you and your guests. I’ve included an editable menu in this guide to make it your own!
- Managing Your Time– These movie nights can take a lot of time to prepare, especially if you plan on doing everything yourself. If you are planning a culinary movie night with a group, I suggest doing a potluck style. Have each person contribute a dish or two, and it’ll be very manageable. If you are planning on preparing everything yourself, here are some things I’ve learned while doing these often:
- Make A To-Do List– I can’t stress this enough! It’s very easy to forget simple things like opening a bottle of prosecco before you start the movie so you aren’t fumbling with the seal before serving. I have done this so many times! Your to-do list should include absolutely everything you need to do leading up to pressing play.
- Start Early– I learned this after a few very long days of trying to cook, prepare, and host all on the same day. Anything that can be done in advance should be done during the days leading up to the movie night. Some examples include pre-mixing cocktails, making desserts and other foods like soup that hold up well in the refrigerator, and pre-making any handmade decorations. Hosting is stressful enough without having to make a multi-course meal in one day, so get as much done as possible before.
- No Pausing– The question I get asked the most is “Do you pause the movie to bring out the next dish?”. It’s important to me that I don’t disrupt the flow of the movie, so I do not pause. It’s also important to me to enjoy the movie with my guests. Setting up everything I need before the movie helps me bring out each dish efficiently. The setup usually includes plating each dish and storing it in the refrigerator, so all I have to do is quickly microwave it before serving. I set out any garnish or decoration on my kitchen counter so it’s easily accessible. I even pour the cocktails into their cups and store them in the refrigerator, so all I have to do is add ice and any finishing touches before serving. Always think about how you can do the bare minimum during the film. I always include the setup in my to-do list as well, so I don’t forget about any aspect of the preparation.
- Optional– If your budget permits, I recommend ordering food that you may not be confident in cooking or food that may take a lot of time to cook. I do this occasionally, and it helps cut down the preparation time and supports local businesses. Win Win!
- Decorations- Have fun and decorate your space and serving tray! Add elements from the theme of the movie, but make a budget and stick to it! I usually use things I already own because these movie nights are DIY, and I don’t need to spend a fortune to make it fun. If I do buy decorations for the movie night, I try to find cheap or reusable things. If you are curious about some of the things I’ve used during the movie nights, here is a link to my Amazon List. All these items are things I bought with my own money and enjoyed using.
- Manage Stress- Culinary Movie Nights are fun and a great way to show your friends and family you love them. Sometimes, things you envision in your head will not come out perfectly. When this happens to me, it can be discouraging and stressful, but the people I do these for have NEVER expressed anything but appreciation. Go easy on yourself and remember that your guests are just happy to be there and to experience something you put so much thought and time into making.
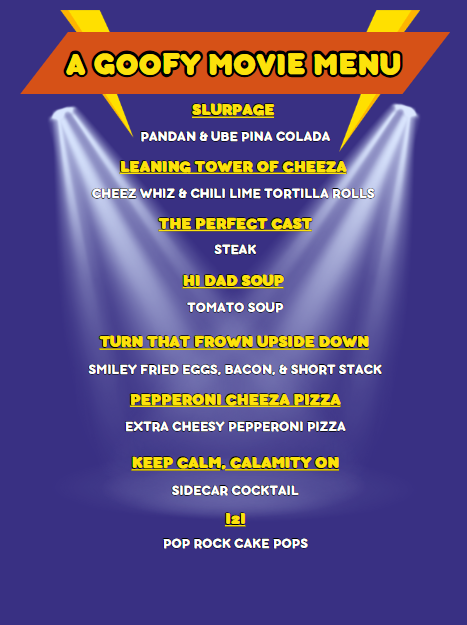
Menu
I have created a free, editable, and printable menu for all the dishes I served for this Culinary Movie Night! Feel free to change it to what will work for you and your guests.
Cues
These are the cues I used during the movie night so I knew when I had to get the next dish ready to serve.
Please note: Each cue describes a scene that happens a few minutes before I have to serve the dish. It does not describe the scene the dish is based on. Some people get confused with that, so I thought I should specify. Because the cues only give you a few minutes to prepare the dish, it’s very important to have everything cooked and set up before the film starts. Review the “Tips” section above for ways to make this seamless.
I often get asked why I don’t use time stamps to keep track of when to serve the next dish and the simple answer is, I don’t find those helpful. If I used timestamps, I would have to have a separate timer going or keep disrupting the movie to check the timestamp. It makes much more sense to have cues to indicate when the next scene is about to happen. This allows me to enjoy watching the film with my guests.
Below is the link to the cues I used. This document is editable, so you can make updates if you decide to take out or change dishes.

Recipes
Slurpage
Ingredients- Serves 2
12 oz of pineapple juice
6 oz of cream of coconut
4 oz of rum
Ube flavoring (I use the brand Butterfly)
Pandan flavoring- has a sweet coconut flavor (I use the brand Butterfly)
4-6 cups of ice cube
Instructions-
- Mix 6 oz of pineapple juice, 3 oz of cream of coconut. 2 oz of rum, 1-2 drops of Ube flavoring, and 2-3 cups of ice in a blender. Add additional flavoring until the mixture is at your desired color. The mixture needs to be thick so you can stack the colors, so add additional ice if it’s still not dense enough. Once you’re happy with the taste, color, and thickness, store your Ube mixture in the freezer while you make the Pandan mixture.
- Mix 6 oz of pineapple juice, 3 oz of cream of coconut. 2 oz of rum, 1-2 drops of Pandan flavoring, and 2-3 cups of ice in a blender. Add additional flavoring until the mixture is at your desired color. The mixture needs to be thick so you can stack the colors, so add additional ice if it’s still not dense enough.
- Pour a short layer of your ube mix into each glass, then a short layer of your pandan mixture. Repeat until you run out of mixture or reach the top of your glass. Top with a fun 90’s straw.
- Because this is a frozen drink, I suggest making this close to when you’re about to start the film.

Leaning Tower of Cheeza
What an iconic scene! Now if I’m being honest, I think Cheez Whiz is gross, so I opted for making a homemade nacho cheese sauce for this dish. If you are recreating this scene, you have a few options. You can stay true to the film and make a tower out of canned Cheez Whiz. You can use the jar version of Chez Whiz. Or, you can make a homemade nacho cheese sauce like I did. See how I did it below. It’s super easy!
Ingredients-
16 slices of kraft yellow American cheese singles
¼ cup of milk
Instructions-
- Add milk to a small pot and heat on the stovetop on medium heat. You want to keep the sauce below a simmer at all times so adjust the heat if it starts to simmer. I like to keep the heat at a 4-5 out of 10.
- Add two kraft singles to your warm milk and stir often until the cheese completely melts. Then add two more cheese slices and repeat this process until all the cheese is melted and the sauce has thickened.
- I recommend making this cheese sauce right before you start the movie and keeping it on your stovetop so it stays at the right temperature. When you’re ready to serve it, pour your hot sauce directly onto your tower sculpture and serve immediately so it’s enjoyed before it cools and hardens.
To make the tower sculpture, I stacked small bowls and glasses to create the right shape and then molded aluminum foil around everything. It’s very hard to make Cheez Whiz hold a shape like it does so I recommend doing something similar to this.
The Perfect Cast
Ingredients-
Filet Mignon (or your choice of cut)
Steak seasoning
1-2 tbsp of Butter or Bacon Grease (I used the leftover bacon grease from the breakfast scene)
Instructions-
- Prepare your steak by tenderizing both sides with a meat mallet or the back of your chef’s knife. This makes it super tender instead of tough and chewy.
- Next, generously coat your steak with your favorite steak seasoning.
- Melt your butter or bacon grease in a pan, and cook your steak for a few minutes on each side until it’s nicely seared. If you like your steak more well done, you can finish it off in the oven at 350 degrees F for a few minutes.
- Remove your steak from the pan and let it rest on your cutting board before cutting it.

Hi Dad Soup
I personally do not like the taste of canned A-Z alphabet soup so I made my own tomato soup. To save time you can use the canned soup. For the letters, you have two options. You can use the letters from the can or if you can find the alphabet dried pasta, you can use that instead. If you want to make your own tomato soup, here is how I made it:
Ingredients-
½ an onion, chopped
3 cloves of mined garlic
1 tbsp olive oil
14.5 oz can of tomatoes
1 tbsp of tomato paste
1 tbsp of better than bouillon
½ tsp of basil
½ tsp of Italian seasoning
½ tsp of oregano
½ tsp of garlic powder
¼ cup heavy cream
½ tsp of black pepper
Salt to taste
Instructions-
- Add the olive oil, chopped onions, and minced garlic to a medium-sized pot on medium-high heat. Cook for a few minutes until fragrant. Then add the tomatoes, tomato paste, and the better than bouillon to the pot. Cook for another few minutes until your paste and better than bouillon are incorporated.
- Add the contents of your pot into a blender and blend on high for 5-10 seconds until everything is smooth.
- Add your soup back to the pot and add all your seasoning and heavy cream. Bring to a simmer and stir often for a few minutes.
- This is a great dish to make ahead of time. Soup tends to develop in flavor over time so you could make this the day before and store in the refrigerator in an airtight container.

Turn That Frown Upside Down
Here’s how I made the smiley face plate and short stack.
- I started by making the bacon. Cook the bacon as you normally would in a pan. To make the smile shape, the most important part is to not overcook the bacon and to shape it while it’s still warm and pliable. I layered a paper towel on my plate to soak up the bacon grease and once the bacon it cooked, I transferred it to the plate and shaped it into a smile. As it cooled, it crisped up and hardened into the smiley shape. Once cooled, I removed the paper towel.
- In the same hot pan, I fried two eggs. I seasoned with salt and pepper and let the egg cook until the edges were crispy. I set up the eggs on the same plate as the bacon to look like the eyes.
- For the nose, I used a three-leaf cut of parsley. I kept it in the refrigerator separate from the eggs and bacon and then added it right before serving (after I reheated the eggs and bacon in the microwave).
- For the short stack, I made buttermilk pancakes from the recipe below. This recipe was incredible! It’s rated 5 stars and has over 13,000 reviews! Before serving, I poured maple syrup on top. Click Here for Recipe
Pepperoni Cheeza Pizza
Who else dreamed about trying this pizza growing up?! I wanted to capture the cheesiness and drippiness so I made some modifications. To save time, I used a frozen pizza. Here is how I made it look like the movie pizza.
- Frozen Pepperoni Pizza- set your frozen pizza on a parchment-covered baking sheet and remove all pepperonis and set aside for later.
- To make it extra cheesy you have a few options. You can add freshly grated mozzarella cheese on top of the cheese that’s already there or you can make a cheese sauce to add to that drippiness effect. Or you can do both for the ultimate cheesy, drippy pizza! If you are doing both, I recommend pouring the cheese sauce and then sprinkling mozzarella on top.
- To make the cheese sauce:
Ingredients-
16 slices of kraft white American cheese singles
¼ cup of milk
Instructions-
- Add milk to a small pot and heat on the stovetop on medium heat. You want to keep the sauce below a simmer at all times so adjust the heat if it starts to simmer. I like to keep the heat at a 4-5 out of 10.
- Add two kraft singles to your warm milk and stir often until the cheese completely melts. Then add two more cheese slices and repeat this process until all the cheese is melted and the sauce has thickened.
After adding your cheese, add the pepperoni on top. The pizza in the movie did not have a lot of pepperoni and it had different shapes. What I did was evenly distribute whole pieces of pepperoni around the pizza. I then cut out smaller circles of pepperoni and uneven pieces.
I cooked the pizza per the instructions on the box and then I torched the top with my kitchen torch to give the top some color.

Keep Calm, Calamity On
Sidecar Cocktail
Ingredients- Serves one
3 oz of cognac
1.5 oz lemon juice
1.5 oz triple sec
1.5 oz filtered water
Instructions-
In a cup with a lid, add all your ingredients and shake well. Store in the refrigerator until you’re ready to serve. When it’s time to serve, shake your premixed cocktail well and pour it in your glass.

I2I
Pop rock cake pops I wanted to depict the moment when Goofy is electrocuted in the bubble while also paying tribute to the legend that is Powerline. I’m really happy with how it turned out with the bubbles and lights. Serving this dish felt like we were at the concert with K-Pop light sticks.
Here is the link for the bubbles
Here is the link for the lights
To save time I bought cake pops at the store and then drizzled chocolate on top and covered them with purple grape pop rocks. If you want to make these fresh, here is a recipe.
