Jurassic Park
Culinary Movie Night Guide
Difficulty Level: Medium


Table of Contents
Equipment
For my Jurassic Park Culinary Movie Night, I don’t have anything specific to link for equipment. I decorated my serving tray with fake moss and a decorative wooden log that I bought from my local Michaels craft store. All the food and drinks I served were thematic but didn’t require any additional equipment, which makes this Movie Night extra affordable!
If you are curious about the equipment I have used in past movie nights, here is a link to my Amazon list!
Tips
- Personalizing the Menu– When planning your menu for your movie night, don’t feel pressured to serve exactly what I chose to serve. Feel free to remove/add/replace dishes so it makes sense for you and your guests. I’ve included an editable menu in this guide to make it your own!
- Managing Your Time– These movie nights can take a lot of time to prepare, especially if you plan on doing everything yourself. If you are planning a culinary movie night with a group, I suggest doing a potluck style. Have each person contribute a dish or two, and it’ll be very manageable. If you are planning on preparing everything yourself, here are some things I’ve learned while doing these often:
- Make A To-Do List– I can’t stress this enough! It’s very easy to forget simple things like opening a bottle of prosecco before you start the movie so you aren’t fumbling with the seal before serving. I have done this so many times! Your to-do list should include absolutely everything you need to do leading up to pressing play.
- Start Early– I learned this after a few very long days of trying to cook, prepare, and host all on the same day. Anything that can be done in advance should be done during the days leading up to the movie night. Some examples include pre-mixing cocktails, making desserts and other foods like soup that hold up well in the refrigerator, and pre-making any handmade decorations. Hosting is stressful enough without having to make a multi-course meal in one day, so get as much done as possible before.
- No Pausing– The question I get asked the most is “Do you pause the movie to bring out the next dish?”. It’s important to me that I don’t disrupt the flow of the movie, so I do not pause. It’s also important to me to enjoy the movie with my guests. Setting up everything I need before the movie helps me bring out each dish efficiently. The setup usually includes plating each dish and storing it in the refrigerator, so all I have to do is quickly microwave it before serving. I set out any garnish or decoration on my kitchen counter so it’s easily accessible. I even pour the cocktails into their cups and store them in the refrigerator, so all I have to do is add ice and any finishing touches before serving. Always think about how you can do the bare minimum during the film. I always include the setup in my to-do list as well, so I don’t forget about any aspect of the preparation.
- Optional– If your budget permits, I recommend ordering food that you may not be confident in cooking or food that may take a lot of time to cook. I do this occasionally, and it helps cut down the preparation time and supports local businesses. Win Win!
- Decorations- Have fun and decorate your space and serving tray! Add elements from the theme of the movie, but make a budget and stick to it! I usually use things I already own because these movie nights are DIY, and I don’t need to spend a fortune to make it fun. If I do buy decorations for the movie night, I try to find cheap or reusable things. If you are curious about some of the things I’ve used during the movie nights, here is a link to my Amazon List. All these items are things I bought with my own money and enjoyed using.
- Manage Stress- Culinary Movie Nights are fun and a great way to show your friends and family you love them. Sometimes, things you envision in your head will not come out perfectly. When this happens to me, it can be discouraging and stressful, but the people I do these for have NEVER expressed anything but appreciation. Go easy on yourself and remember that your guests are just happy to be there and to experience something you put so much thought and time into making.
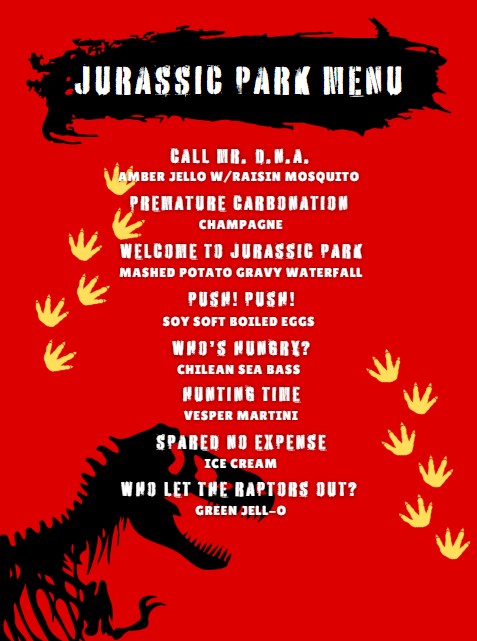
Menu
I have created a free, editable, and printable menu for all the dishes I served for this Culinary Movie Night! Feel free to change it to what will work for you and your guests.
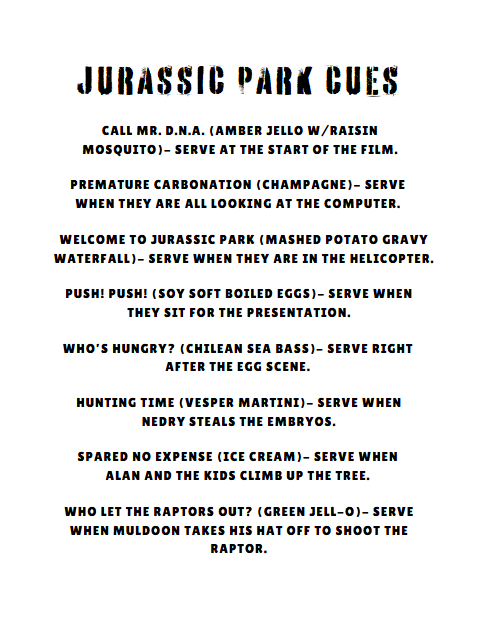
Cues
These are the cues I used during the Movie Night, so I knew when I had to get the next dish ready to serve.
Please note: Each cue describes a scene that happens a few minutes before I have to serve the dish. It does not describe the scene the dish is based on. Some people get confused with that, so I thought I should specify. Because the cues only give you a few minutes to prepare the dish, it’s very important to have everything cooked and set up before the film starts. Review the “Tips” section above for ways to make this seamless.
I often get asked why I don’t use time stamps to keep track of when to serve the next dish and the simple answer is, I don’t find those helpful. If I used timestamps, I would have to have a separate timer going or keep disrupting the movie to check the timestamp. It makes much more sense to have cues to indicate when the next scene is about to happen. This allows me to enjoy watching the film with my guests.
Below is the link to the cues I used. This document is editable, so you can make updates if you decide to take out or change dishes.
Recipes
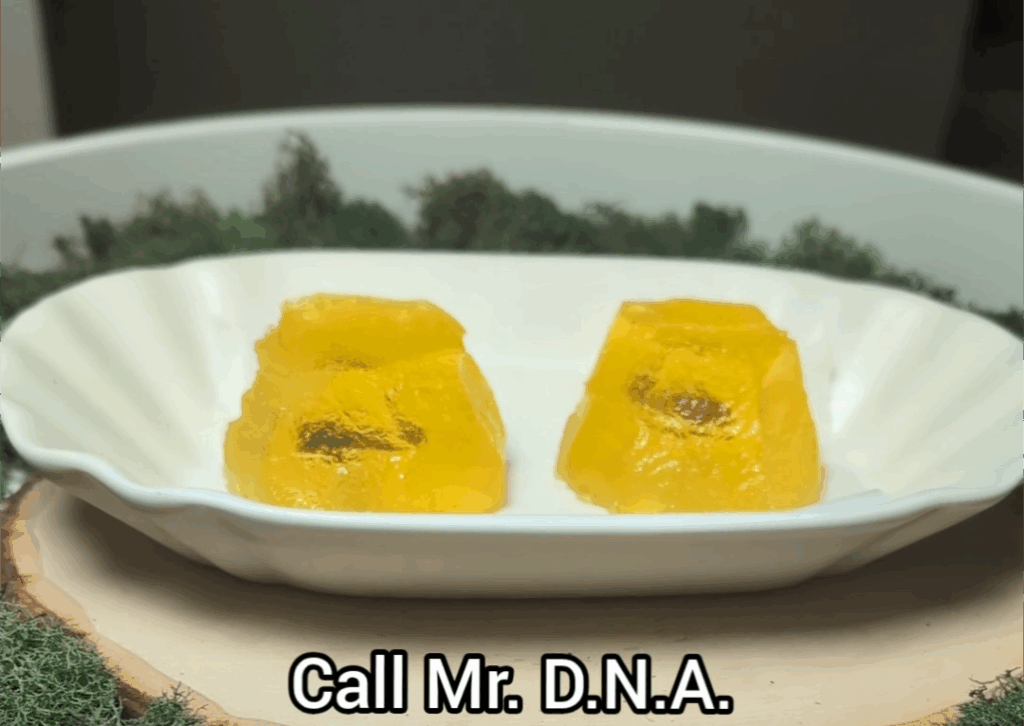
Call Mr. D.N.A
I knew I had to replicate the iconic mosquito in amber that started the entire Jurassic Park franchise. I used the pineapple Jello flavor because it was more amber-colored than the usual yellow lemon Jello. For the mosquito, I used a raisin.
How to make the Jello:
- To make the Jello where the raisin is in the center, you first will need to make ONLY HALF of the Jello in the packet. Set the other half aside for later. Make the Jello following the instructions on the package but remember to half all the ingredients.
- Pour the first half of the Jello in your container and let it set in the refrigerator for a few hours. After a few hours, make the second half of your remaining Jello.
- Take your Jello container out of the refrigerator and place several raisins on top, making sure to space them out. Then gently pour the remaining Jello on top. Make sure to arrange your mosquito raisins in case they move when you pour the liquid.
- Let the Jello set overnight. You can then flip the container over on a cutting board and gently remove the Jello by wiggling and tapping the container. Cut your pieces to look like the amber stone. Because you let the bottom half of the Jello solidify first, the raisin will look like it’s floating in the Jello, making a cool effect just like the mosquito in amber.
Preparation tips: I recommend making these the day before you host Movie Night so the Jello has enough time to solidify. You can also cut them before the movie starts, plate them, and store them in the refrigerator so it’s easy to grab when you are ready to serve.
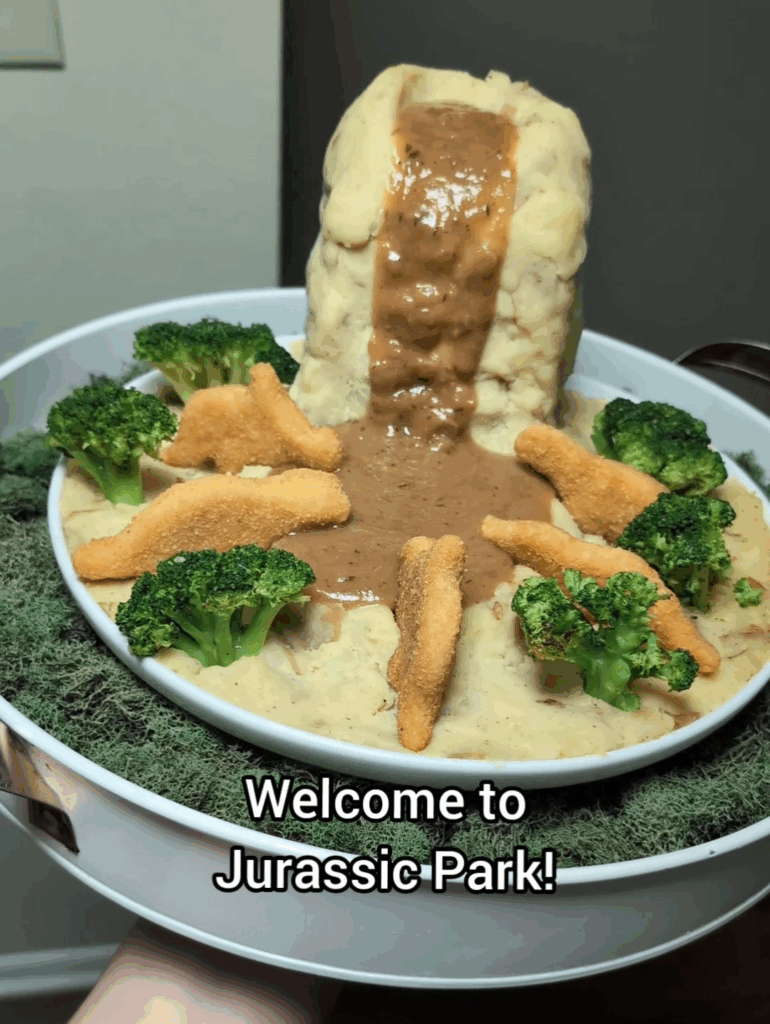
Welcome to Jurassic Park
If you are chronically online like I am, you have probably seen this mashed potato, gravy waterfall plate with the broccoli trees and dino nuggets. I knew I had to recreate it for the famous line “Welcome to Jurassic Park”!
Mashed Potatoes: To make the mashed potatoes, keep it simple to save time. Boil your potatoes, I used Yukon Gold Potatoes, and when they are tender, drain the water. Using a potato masher, mash your potatoes. Then, add a few tbsp of butter and heavy cream and mix the potatoes until the butter is melted. Add salt, black pepper, garlic powder, onion powder, and rosemary powder and keep tasting and adjusting your seasonings to match your preference.
Gravy: You can buy canned gravy to save time, but I recommend making it because it’s quick and tastes way better than canned.
To make gravy-
Ingredients:
2 tbsp of butter
2 tbsp of olive oil
½ cup of diced onions
3 garlic cloves, minced
3 tbsp of flour
3 cups of stock (preferably beef)
1 tbsp Better Than Bouillon beef base
1 tsp of dried thyme
Salt and black pepper
Instructions:
- Add butter, olive oil, and diced onions to a saucepan and heat over medium heat. After a few minutes of stirring occasionally, add minced garlic. Cook for another minute, stirring often.
- Next, sprinkle in the flour while continuing to stir. It will form a paste. Once all the flour is added, slowly pour in your stock while continuing to stir. When all the stock is added, add the Better Than Bouillon.
- Bring your gravy to a simmer and stir often. The gravy will thicken. Water can be added if you want a more liquid gravy. When you are happy with the consistency, add your thyme and salt, and black pepper to taste.
Broccoli: To make the broccoli, I kept it simple by using frozen broccoli florets. On a parchment-lined baking sheet, I drizzled some oil, garlic powder, salt, and pepper on them and roasted them in the oven at 350 degrees F for about 20 minutes.
Dino Nuggets: You can find these nuggets in the frozen meals section of most major grocery stores. Make them as per the packaging instructions.
Assembly & Prep Tips: I recommend making the gravy the day before. It saves time on the day of the movie night, and the gravy will develop in flavor overnight and be even more delicious the next day. When you make the mashed potatoes, wait till they’re cooled off enough to touch and make your waterfall. I used a small, upside-down mason jar to be the mold of the waterfall. When making the watering hole and waterfall, make sure to create a border so the gravy is guided down and doesn’t go everywhere. Also, make sure you don’t make the waterfall too tall. You want it to be able to fit in the microwave so you can reheat. Add the dino nuggets and broccoli, and make sure they are really stuck in the mashed potatoes, so they keep standing up.
Serving Tips: I made this plate close to when I was going to start the movie, so I was able to leave the plate out on my counter and reheat it in the microwave before serving. I also reheated the gravy and poured it down the waterfall right before serving. You also have the option of making this plate earlier in the day and storing it in your refrigerator. If you go this route, keep in mind that it will take longer to reheat in the microwave than it would if it were at room temperature.
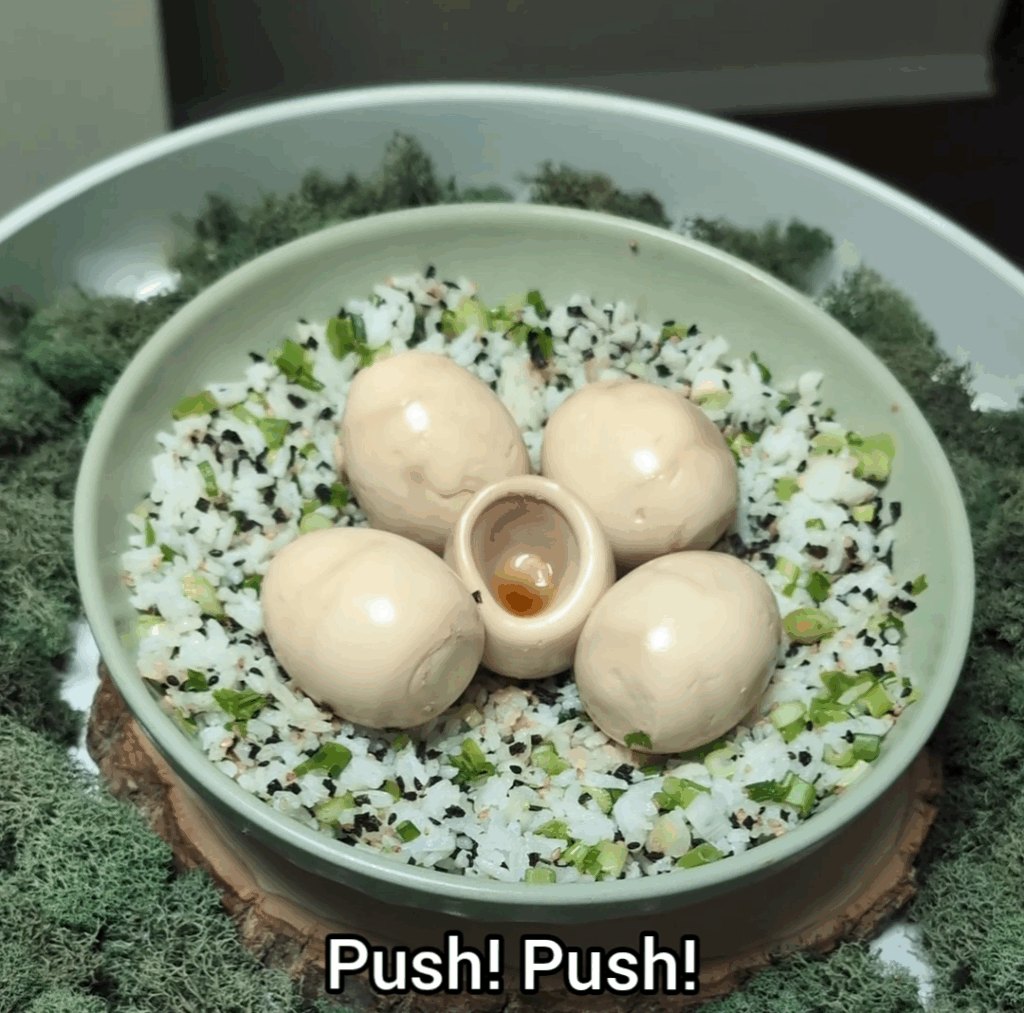
Push! Push!
This is the recipe I used to make the soy eggs.
One thing I did differently to make it look more dinosaur-like is I marinated the eggs with the shell still on, but cracked. This way, there were markings on the eggs when I eventually peeled them. One thing I recommend doing is making these the day before, so they are deeper in color. I made them the day of so the eggs didn’t have enough time to fully marinate. Make sure you also peel the eggs before you start the movie so they are ready to serve.
Green onion rice: Make white rice as you normally would. Then add chopped green onion, furikake seasoning, and some sesame oil. Mix well and create a nest shape in a bowl. Store in the refrigerator and microwave before serving so the rice is hot. Then add the peeled marinated eggs to the center of the “nest”.
Who’s Hungry?
Chilean Sea Bass is also known as Patagonian Toothfish. I tried recreating this dish to the best of my ability, and I’m really happy with how it came out! There are multiple components to this dish. You have the Chilean Sea Bass, which looks to be breaded or covered in a crust of some sort. You have the thin, crispy fries on top, which look to be sweet potatoes. There are long green beans and cherry tomatoes. On the bottom, there is a delicious-looking sauce or gravy.
Below is my interpretation of the dish:
Crispy Sweet Potato Fries:
You’ll need one sweet potato chopped very finely and long. Once you have the potato chopped, you can add it to a bowl of ice water. This removes excess starch and makes the fries extra crispy. It’s an optional step, but it’s quick and easy, so I recommend it. Remove from the ice water and pat dry. While you do this, add frying oil to a deep-frying pan. I added enough to be about half an inch tall in the pan. Keep the heat at medium-high and wait about 5 minutes for the oil to heat. When it’s ready for frying, add your thinly sliced sweet potatoes to the pan. Move them around and flip them every minute so they can cook evenly. Because they are thin, they will burn quickly so keep an eye on them. When they become hard, almost chip-like, remove them from the pan and place them on a plate lined with paper towels to soak up the oil. Coat them with seasoned salt, my favorite brand is Lawry’s. You can make these in advance and leave them out for a few hours because they are so thin, they pretty much become potato chips. Save the oil you used for the Chilean Sea Bass.
Chilean Sea Bass:
To make the fish, I started by coating the fillets with flour. I then dipped them in a bowl of raw eggs that had been whisked, and then I coated them with an Italian bread crumb blend. The brand I used for breadcrumbs is Cento. Once all the fillets are coated, add frying oil (I used the avocado oil from the crispy sweet potatoes) to a deep-frying pan. I added enough to be about half an inch tall in the pan. Keep the heat at medium-high and wait about 5 minutes for the oil to heat. Cook the fish for about 2-3 minutes per side. You don’t want to overcook the fish, so this is all they need. Just enough time to get the bread coating a golden brown.
Sauce: I went with a creamy lemon sauce for this recipe because I thought it would pair nicely with the white fish. Here’s how to make it:
Using the same pan from the Chilean sea bass with the leftover oil, add two chopped shallots. Heat on medium heat for a few minutes. Then add three garlic cloves, minced. Cook for another minute. Then add three tbsp of flour and cook while stirring often. The oil will thicken and become a paste. Next, add ¼ cup of lemon juice, ¼ cup of heavy cream and ¼ cup of water. Stir and bring to a simmer. The sauce will thicken. Add salt and black pepper to taste. This sauce is so easy to make! I love adding it to pasta and chicken as well!
Green Beans and tomatoes: I chopped the cherry tomatoes before the movie started and stored them in the refrigerator until it was time to plate the dish. To cook the green beans, I boiled them in water for a few minutes, so they were cooked but still crisp. I did not add seasoning because the sauce will be enough.
Serving tips: Before the move started, I added the sauce to the plate, then chopped the fish and arranged them on the plate with the green beans to look like the movie plate. I stored the plate in the refrigerator. When it was time to prepare to serve, I microwaved the dish, then added the cherry tomatoes and crispy fries on top before serving.

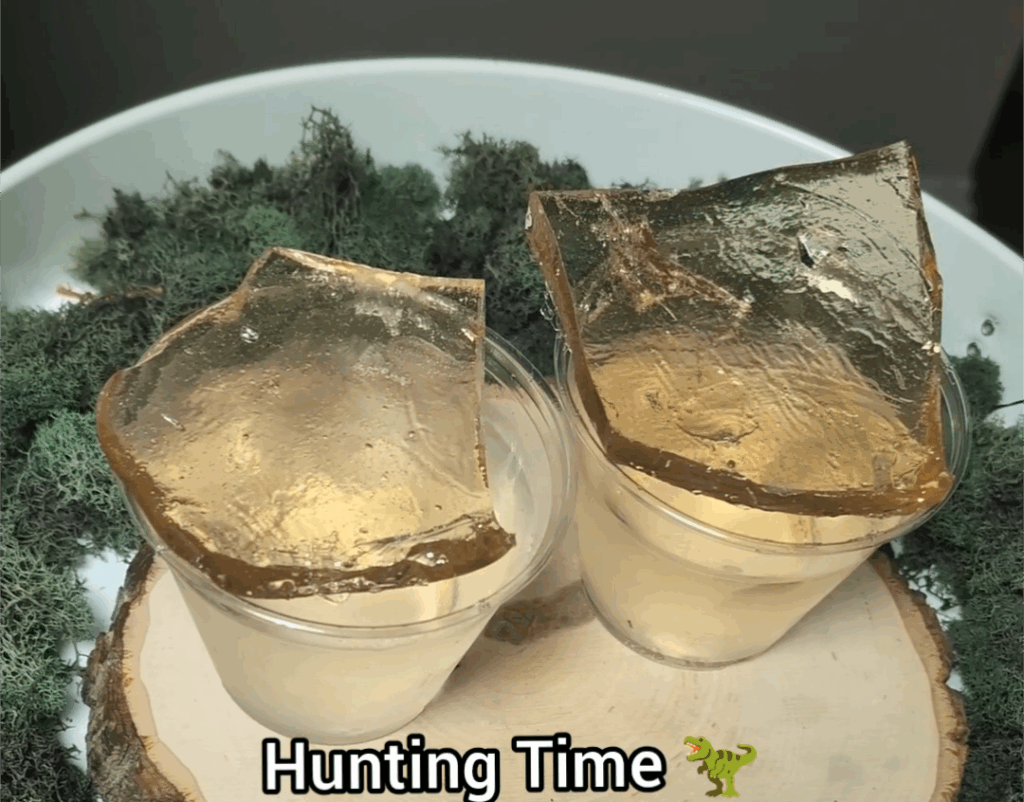
Hunting Time
This is such a chilling scene with the water shaking before we spot the T-Rex for the first time! I recommend getting the wide plastic cups like the ones they have during the scene to be more on theme. I chose to serve a vesper martini because it’s a clear cocktail that resembles water. It also has a very dinosaur-sounding name in my opinion. You can also serve water if you aren’t a fan of drinking. I actually don’t like Vesper martinis because they’re too strong for me, so I served myself a very light colored white wine instead. Here is the recipe for the shattered glass candy.
The recipe worked really well. I didn’t have a thermometer, though, so I just cooked the sugar liquid until it was pretty thick and then poured it.
Here is the Vesper martini recipe. Fun fact: This is the martini James Bond is famous for drinking.
Serving tips: Before the film, add your drink ingredients to a jar and shake. Store them in the refrigerator or freezer so it gets chilled. Add your piece of shattered glass to your cup, making sure to leave space for you to sip. Have it ready on your counter so when it’s time to serve, you just have to shake your drink and pour it into the cup. The candy will get stuck to your cup so I recommend leaving it there while you drink. If you try to remove it, your drink might spill from the force.
Spared No Expense
This is an easy one! Ice Cream! You can choose to serve it however you like. In the scene, they were eating from tubs of all different flavors. I chose to serve vanilla ice cream, with olive oil and sea salt (for the tears). I love this combo! It tastes like a lighter version of salted caramel.
To make serving quick, you can pre-scoop the ice cream before the movie starts and cover it in plastic wrap. Then you just need to add them to the bowl, and quickly drizzle your toppings.

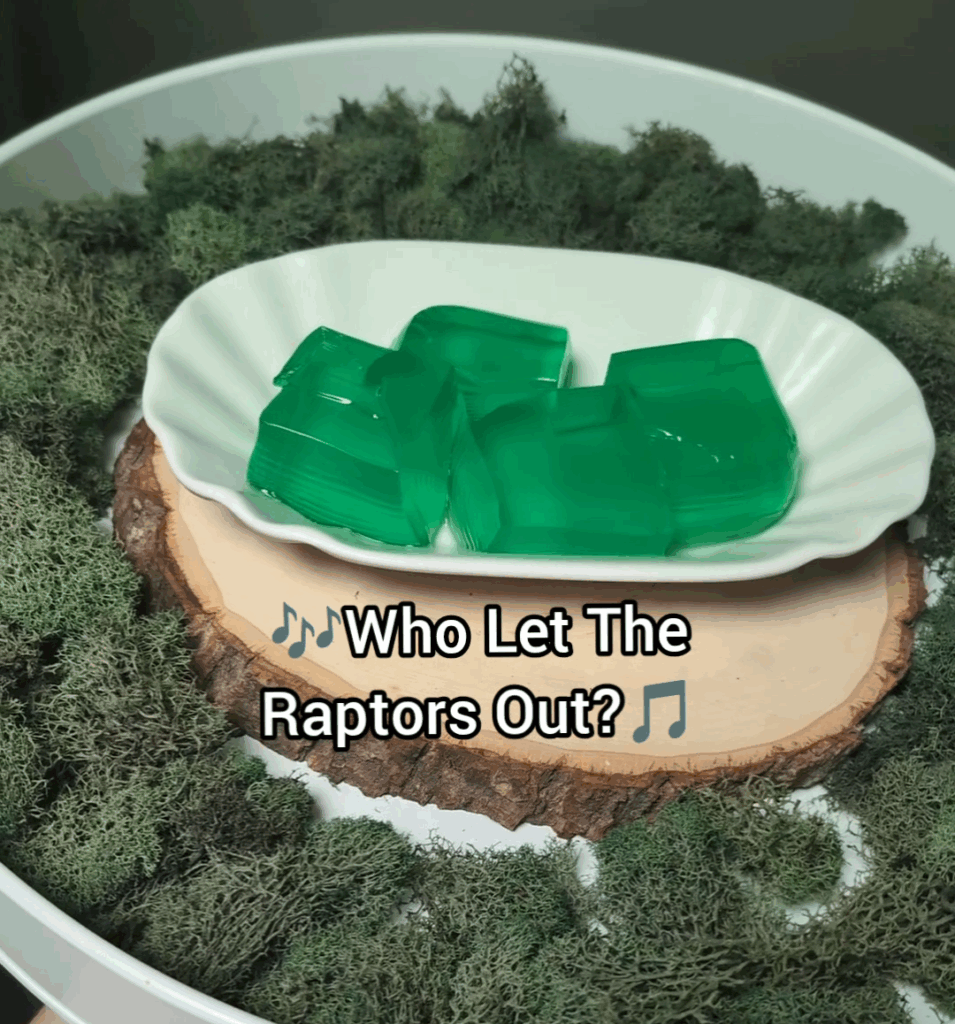
Who Let The Raptors Out?
You can’t have a Jurassic Park movie night and not serve green Jello! The Jello I used was the lime Jello you can buy from most supermarkets. I made it per the instructions on the packaging. I recommend making this the day before so it can fully set. When cutting the pieces, make sure they are big rectangular shapes to match the movie. I recommend having them cut and plated before you start the movie, so you can quickly grab the plate to serve.