
Coraline
Culinary Movie Night Guide
Difficulty Level: Very Hard

Table of Contents
Equipment
Here is a list (with links) of all the equipment and decorations I used for my Coraline Culinary Movie Night. I would be incredibly grateful if you used my links. I will make a little commission, and that would really help with the cost of the website and related expenses. You can find my full Amazon List here!
- Black Buttons
- Glass Milkshake Bottles
- Piping Kit for Cake, Cupcakes, and Beetle Legs
- Red Writing Gel for Cake
- Prickly Pear Syrup
- Chicken Butt Magnets (These magnets are super cute, but they are not strong, and one of my chickens came broken.)
Tips
- Personalizing the Menu– When planning your menu for your movie night, don’t feel pressured to serve exactly what I chose to serve. Feel free to remove/add/replace dishes so it makes sense for you and your guests. I’ve included an editable menu in this guide to make it your own!
- Managing Your Time– These movie nights can take a lot of time to prepare, especially if you plan on doing everything yourself. If you are planning a culinary movie night with a group, I suggest doing a potluck style. Have each person contribute a dish or two, and it’ll be very manageable. If you are planning on preparing everything yourself, here are some things I’ve learned while doing these often:
- Make A To-Do List– I can’t stress this enough! It’s very easy to forget simple things like opening a bottle of prosecco before you start the movie, so you aren’t fumbling with the seal before serving. I have done this so many times! Your to-do list should include absolutely everything you need to do leading up to pressing play.
- Start Early– I learned this after a few very long days of trying to cook, prepare, and host all on the same day. Anything that can be done in advance should be done during the days leading up to the movie night. Some examples include pre-mixing cocktails, making desserts and other foods like soup that hold up well in the refrigerator, and pre-making any handmade decorations. Hosting is stressful enough without having to make a multi-course meal in one day, so get as much done as possible before.
- No Pausing– The question I get asked the most is “Do you pause the movie to bring out the next dish?”. It’s important to me that I don’t disrupt the flow of the movie, so I do not pause. It’s also important to me to enjoy the movie with my guests. Setting up everything I need before the movie helps me bring out each dish efficiently. The setup usually includes plating each dish and storing it in the refrigerator, so all I have to do is quickly microwave it before serving. I set out any garnish or decoration on my kitchen counter so it’s easily accessible. I even pour the cocktails into their cups and store them in the refrigerator, so all I have to do is add ice and any finishing touches before serving. Always think about how you can do the bare minimum during the film. I always include the setup in my to-do list as well, so I don’t forget about any aspect of the preparation.
- Optional– If your budget permits, I recommend ordering food that you may not be confident in cooking or food that may take a lot of time to cook. I do this occasionally, and it helps cut down the preparation time and supports local businesses. Win Win!
- Decorations- Have fun and decorate your space and serving tray! Add elements from the theme of the movie, but make a budget and stick to it! I usually use things I already own because these movie nights are DIY, and I don’t need to spend a fortune to make it fun. If I do buy decorations for the movie night, I try to find cheap or reusable things. If you are curious about some of the things I’ve used during the movie nights, here is a link to my Amazon List. All these items are things I bought with my own money and enjoyed using.
- Manage Stress- Culinary Movie Nights are fun and a great way to show your friends and family you love them. Sometimes, things you envision in your head will not come out perfectly. When this happens to me, it can be discouraging and stressful, but the people I do these for have NEVER expressed anything but appreciation. Go easy on yourself and remember that your guests are just happy to be there and to experience something you put so much thought and time into making.
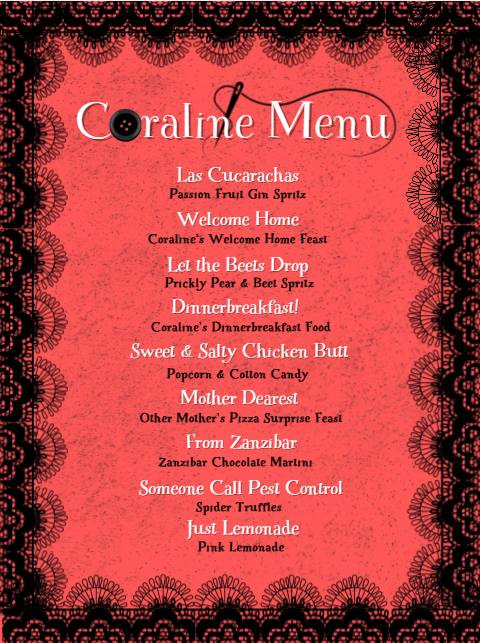
Menu
I have created a free, editable, and printable menu for all the dishes I served for this Culinary Movie Night! Feel free to change it to what will work for you and your guests.
Cues
These are the cues I used during the movie night, so I knew when I had to get the next dish ready to serve.
Please note: Each cue describes a scene that happens a few minutes before I have to serve the dish. It does not describe the scene the dish is based on. Some people get confused with that, so I thought I should specify. Because the cues only give you a few minutes to prepare the dish, it’s very important to have everything cooked and set up before the film starts. Review the “Tips” section above for ways to make this seamless.
I often get asked why I don’t use time stamps to keep track of when to serve the next dish, and the simple answer is, I don’t find those helpful. If I used timestamps, I would have to have a separate timer going or keep disrupting the movie to check the timestamp. It makes much more sense to have cues to indicate when the next scene is about to happen. This allows me to enjoy watching the film with my guests.
Below is the link to the cues I used. This document is editable, so you can make updates if you decide to take out or change dishes.

Recipes
Las Cucarachas
The bugs we see in Coraline’s bathroom are actually silverfish bugs, not cockroaches, but I thought “Las Cucarachas” has a better ring to it. When she was washing off their guts (WHY DID SHE USE HER HANDS????), it reminded me of passion fruit pulp and seeds. This is why I decided to serve a passion fruit gin spritz.
Passion Fruit Gin Spritz Recipe

Welcome Home Feast
This is the first of the many feasts I made for this movie night. There is so much food in this movie, so be prepared to COOK! To make my life easier, I tried to simplify as much as I could.
Some ways I saved time: I bought the juices instead of making them, and I bought a premade cake, so all I had to do was decorate it. Do whatever you can to save time!
For this welcome home feast, I chose to serve the following:
- Cornish Hen & Potato Pot Roast
- Dinner Rolls (I made these from scratch so I could match the X on top)
- Mashed Potatoes & Gravy
- Peas and Corn on the Cob
- Poached Pears
- Mango, Strawberry, and Green “Milkshakes” (In the movie, they call these milkshakes. However, they are VERY liquidy, so I chose to serve juice instead)
- Coraline’s Welcome Home Cake
Cornish Hen & Potato Pot Roast
Please note: This is an extremely simplified Pot Roast Recipe. It will taste delicious, but it’s not impressive by any means. My main goal was to be time-efficient while serving yummy food.
To start, make sure to properly clean your Cornish hen. Preheat your oven to 275 degrees F. Place your cleaned Cornish Hen on a parchment-lined deep baking sheet or oven-safe pot. Drizzle with olive oil and generously coat with poultry seasoning. I used Adobo seasoning and added some freshly cracked black pepper and smoked paprika.
Rub all the ingredients on the Cornish hen so it’s coated everywhere. Once your hen is well seasoned, cover the top with aluminum foil and bake for 1 hour and 30 minutes.
When the 1.5 hours are almost done, dice a few potatoes. I used russet potatoes for their affordability. Drizzle the chopped potatoes with olive oil and the same seasonings you used on the Cornish hen, and toss the potatoes so they are evenly coated. Raise the temperature of the oven to 350 degrees F, and add the diced potatoes to the same pot with the Cornish hen. Make sure the potatoes surround the hen so they soak up all the juices. Bake, uncovered, for an additional 30 minutes.
I made my own dinner rolls because I wanted to match the X mark on the top of the ones in the movie. This is an extra step that takes time, so if you don’t care about having the X mark, you can save time by buying dinner rolls.
If you do make this recipe, to make the X mark, you will have to individually score the rolls before you bake them. All that means is that you take a very sharp knife and cut an X on top of each dough ball.
Mango, Strawberry, and Green “Milkshakes”
They called these milkshakes, but they looked too liquidy in the movie, so to save time and make it look like what Coraline drinks, I went with juice. I lived in South Florida at the time of filming this, so it’s common to find little jars of mango juice and other tropical juices in the supermarket. Hopefully, you can find them too. I got mango juice, strawberry juice (guava has the same pink color too), and green juice. I placed them in the jars as part of my prep and stored them in the refrigerator until it was time to serve the meal.

Mashed Potatoes & Gravy
I made my own gravy because I think the taste of homemade gravy is far superior to canned gravy, but if you don’t mind using canned, you can definitely go with that to save time!
Mashed Potatoes: To make the mashed potatoes, keep it simple to save time. Boil your potatoes, I used Russet Potatoes, and when they are tender, drain the water. Using a potato masher, mash your potatoes. Then, add a few tbsp of butter and heavy cream and mix the potatoes until the butter is melted. Add salt, black pepper, garlic powder, onion powder, and rosemary powder, and keep tasting and adjusting your seasonings to match your preference.
Gravy: You can buy canned gravy to save time, but I recommend making it because it’s quick and tastes way better than canned.
To make gravy-
Ingredients:
2 tbsp of butter
2 tbsp of olive oil
½ cup of diced onions
3 garlic cloves, minced
3 tbsp of flour
3 cups of stock (preferably beef)
1 tbsp Better Than Bouillon beef base
1 tsp of dried thyme
Salt and black pepper
Instructions:
Add butter, olive oil, and diced onions to a saucepan and heat over medium heat. After a few minutes of stirring occasionally, add minced garlic. Cook for another minute, stirring often.
Next, sprinkle in the flour while continuing to stir. It will form a paste. Once all the flour is added, slowly pour in your stock while continuing to stir. When all the stock is added, add the Better Than Bouillon.
Bring your gravy to a simmer and stir often. The gravy will thicken. Water can be added if you want a more liquid gravy. When you are happy with the consistency, add your thyme and salt, and black pepper to taste.
Peas and Corn on the Cob
I used the same seasonings for both vegetables. I kept it simple by using salt, black pepper, and garlic powder. I got the small corn on the cob from the frozen vegetable section in the grocery store, as well as the peas.
Start by boiling water in a medium-sized pot. Once it’s boiling, add your frozen corn on the cob. Make sure they are fully submerged in the water. Add more water if necessary. Bring to a boil again and let them boil for 5 minutes. Drain the water, and while the corn is still hot, add some butter and your seasonings (to your taste). Toss the corn so it is evenly coated with butter and seasonings.
Remove the finished corn and in the same pot, add your frozen bagged peas. Heat on the stove top at medium heat. Add more butter and seasonings to your taste and stir occasionally. Peas wrinkle when they are overheated, so make sure to only cook them for about five minutes. You can try one pea to test it when you think they are done.
Poached Pears
Here is the recipe I used.

Coraline’s Welcome Home Cake

Another way I was able to make my prep a little less stressful was by buying a cake already made, so I just had to decorate it. But, pretty much all premade cakes come pre-frosted. My solution was those frozen cheesecakes. I think serving a cake that’s not what people are expecting on the inside is even more on theme, too! Coraline’s cake has a double loop for the “O” in home because it’s a lie. This is not her home, so the cake is misleading. Just like serving a cheesecake. Lol!
Now, on the subject of the double “O”… As you can see, my cake does not have it. A lot of people had a problem with that. All I have to say to that is… writing with a gel pen is hard, okay? LMAO! I really tried to make it look as close to the movie cake as possible, but not everything will always work out as you want it to when doing these Movie Nights. Especially a really hard one like Coraline. I think in the end it was okay, though, because I’m not the other mother, and people are actually at home at my place. 😊
Here is the vanilla buttercream frosting recipe I made to decorate the cake. Set aside a small portion of your frosting for the white detailing on the cake where you put the candles. You will also need pink gel food coloring for the rest of the frosting. I added a little bit at a time to my frosting until I got the right color.
I frosted my cake when it was frozen. I find it’s easier to frost a cake when it’s solid.
Cover the top of your cake with some pink frosting and smooth it out so it covers the entire top. Add the rest of your pink frosting to your piping bag with a decorative piping tip that comes with the kit. Pipe the bottom border of the cake. Then, pipe the side of the cake to make it look like it’s dripping down.
Then add the white frosting to a clean piping bag with a thinner tip and make the little flower markings where you’ll put the candles. For the candles, I bought a cheap pack of white and pink ones from my grocery store in their baking aisle. In the movie, they are pink, so if you can find all pink, that’s better.
Lastly, use the red gel pen to write Welcome Home in cursive!
I decorated the cake earlier in the day and let it sit on my kitchen counter, defrosting, until it was time to serve.

Serving Tips: Before the film started, I made sure I had the Cornish Hen & Potato Pot Roast, Mashed Potatoes & Gravy, Peas and Corn on the Cob, and Poached Pears plated. When it was time to serve, I heated these dishes in the microwave. The rolls can be served at room temperature. I also lined the front of the serving tray with some broccoli to match the table setup in the movie.
Besides the cake, everything in this meal can be made the day before and still tastes good reheated. I highly recommend you make time the day before to prep what you can because there is SO MUCH COOKING!
Let the Beets Drop
Here me out, because I usually hate beets, but this drink was actually really nice. The sweetness of the prickly pear really helps cut the earthy flavor of the beets.
Prickly Pear & Beet Spritz
Ingredients: Serves 1
1.5 oz Gin
2 oz of beet juice
1 oz of Prickly Pear Syrup
Club Soda (to top off the drink)
Raw beet sliced in half, for garnish
Instructions:
Add your gin, beet juice, and Prickly Pear Syrup to a jar with a lid. Multiply the ingredients based on how many people you are serving. Shake and store the jar in the refrigerator. I did this step the day before the movie night to save time the day of.
Before I started the movie, I made sure to prep my beet garnish and stored it in the fridge so it’s easy to grab. When it’s time to serve, add ice to your cups. Shake your premixed cocktail and evenly split it between your cups. Top each cup with a little bit of club soda and place the beet garnish on top.

Dinnerbreakfast!
Another icon feast from Coraline! To save time, I bought frozen waffles, breakfast sausage, and mini muffins from my grocery store. The only part I made was the strawberry compote and scrambled eggs.
Scrambled Eggs
I think everyone pretty much knows how to make scrambled eggs, so I won’t go into too much detail. I would suggest adding some cheddar cheese and a dash of milk to them when you make them so they are extra creamy. I also suggest that you continuously stir the eggs to get the best consistency and make sure the heat is not too high, so the eggs don’t get overcooked.
Serving Tips: I recommend having the muffins, eggs, sausage, and waffles (minus the compote) plated before you start the movie. Keep the eggs, sausage, and waffles in the refrigerator as well as the compote. When it’s time to serve, you can heat up the waffles, compote, eggs, and sausage in the microwave. Then pour the compote on the waffles. You want to keep those separate until the last minute so your waffles don’t get soggy.

Sweet & Salty Chicken Butt
The circus scene is an easy dish to set up, and there is no prep involved!
I served popcorn, cotton candy pieces and a chicken butt magnet. This scene features the popcorn coming out of a chicken butt, hence the magnets. LOL!
I recommend you use pre-popped popcorn instead of microwaveable/freshly popped popcorn. Fresh popcorn tends to get soggy if not consumed right away.
For the cotton candy, I purchased a tub of it from the grocery store in the candy section. I did not put the cotton candy in the serving cups until it was time to serve because I didn’t want it to get soggy. I lived in South Florida at the time of filming this Movie Night so the humidity is HIGH!
I do suggest having the popcorn already set up in the cup to save time, though. Then you just have to add little pieces of cotton candy and the chicken butt magnet before serving.

Mother Dearest
For this scene, The Other Mother leaves a feast of pepperoni pizza, grilled cheese sandwiches, hot dogs, and cupcakes for Coraline.
Because this movie features so much food, I wanted to serve mini versions of everything. Also, to save time, I bought a personal-sized frozen pizza and premade mini cupcakes.
For the cupcakes I bought, I scraped off the frosting that came on them. The frosting is pink in the movie, just like Coraline’s cake, so I made sure to save extra frosting from the cake to frost the cupcakes. Here is the vanilla buttercream frosting recipe I made to decorate the cake. You will also need pink gel food coloring to make the frosting pink. I added a little bit at a time to my frosting until I got the right color.
Use the piping kit to pipe the frosting on top of the cupcakes and add a cherry on top. This is something you can make earlier in the day and set aside since the cupcakes do not need to be refrigerated.
For the pizza, I cooked it in the oven, per the cooking instructions, during the film, so it was fresh. Because it’s a small pizza, it didn’t need that long to cook. I recommend popping it in the oven when you are waiting for the “Dinnerbreakfast Food” to heat up.
For the mini hot dog buns and mini grilled cheese, I used the same dough from the dinner rolls I made from the “Welcome Home Feast”. This is definitely optional! You can save time by making full-sized grilled cheese sandwiches and hot dogs. If you are going to make the mini versions, here is the dough recipe I used.
For the mini hot dog buns, you’ll want to roll out the dough balls so they are long, not round. Basically, make them the shape of a hot dog bun. The rest you can make into dough balls. When they are baked, you can slice them like sandwich bread.
Mini Hot Dogs– I used Lit’l Smokies as the mini hot dogs. They are fully cooked, so you can just pan-fry them a little bit to give them some color. Make a little slice in your mini, cooked hotdog buns and place your Lit’l Smokies inside. I then plated the hot dogs and reheated them when it was time to serve. Add your condiments too before serving, or give your guests the option to add their own.
Mini Grilled Cheese– Add butter to a skillet and fry your bread slices on both sides. Break up small pieces of yellow, American Cheese (or melting cheese of your choice), and add to your bread. Close the sandwiches and let the cheese melt, flipping the grilled cheese sandwiches so they get an even grill. Plate these as well and reheat in the microwave before serving.

Zanzibar Chocolate Martini
Chocolate Martini Recipe
Ingredients: Serves 1
1.5 oz Vodka
4 oz Chocolate Crème liqueur (my favorite is the brand Valmas)
1 oz simple syrup
Instructions:
Add the vodka, simple syrup, and chocolate cream liqueur to a jar and shake to combine. Store it sealed in your refrigerator until it’s time to serve. This is a great item to make beforehand so you can save time with the other prep. I usually premix my drink a day or two before movie night, and this way it gets nice and cold in the refrigerator.
To make the beetle decoration on the cup, add ½ cup of chocolate chips and 1 tsp of coconut oil to a microwave-safe dish. Microwave in 15-second increments and stir in between. Chocolate burns easily, so make sure not to cook it for more than 15 seconds at a time.
When the chocolate is melted, add half of the melted chocolate to your piping bag with a very thin tip. On a parchment-lined baking sheet, pipe out “L” shaped insect legs. Make a bunch because you will need these for the truffles in the next scene. It’s also better to play it safe and make extra in case some of them break.
If your chocolate is too runny, wait a few minutes for it to cool a bit and then pipe the legs. When you are done with the legs, place the baking sheet in the freezer so they harden fast.
Meanwhile, dip your cup’s rim into the remaining melted chocolate. While the rim is still wet, place your button eyes on the top of the cup so they harden in place. Also, place your cooled beetle legs on the chocolate rim while it’s still wet so the legs harden in place as well. Store in the refrigerator until it’s time to serve. When you are ready to serve the drink, evenly pour the premixed martini into your cups.
You can also serve chocolate milk as an alcohol alcohol-free option for kids. Be careful that the buttons are not consumed, as they are a choking hazard for kids.

Someone Call Pest Control
This dish is another example of things not going as I planned. Especially when hosting a really difficult Movie Night like Coraline. The cute truffles I made fell on the floor as I was about to serve them. Luckily, I made extras, but they were not as cute as the first ones I wanted to serve. ☹
Truffle Recipe
Ingredients-
8oz package of cream cheese
1 package of regular Oreos
2 cups of milk chocolate
1 tbsp of coconut or vegetable oil (for milk chocolate)
Instructions-
- In a blender, add all the Oreos and blend until they are a sand-like consistency.
- Add the blended Oreos to a bowl with the cream cheese. Mix until the cream cheese is completely incorporated with the Oreos. I use my hands. It’s messy, but it yields the best results.
- Roll the truffle dough into balls and place them on a parchment-lined baking sheet. Put the baking sheet in the freezer so they can harden.
- In a microwave-safe container, add the milk chocolate chips and 1 tbsp of the oil. Microwave for 30 seconds and then remove and stir. Then, keep microwaving in 15-second increments, removing in between to stir well. Chocolate burns very easily, so it’s important to only expose it to the heat of a microwave briefly while stirring often.
- Once your chocolate is ready for dipping, dip them in the chocolate and use a fork to remove the chocolate-covered truffles. Place each truffle back on the parchment paper.
- While the truffles are still wet, please the button eyes on them as well as the chocolate insect legs you made for the martinis. (see below)
- Place the tray in the freezer. After about 15 minutes, they will be completely hardened, and you can move them to the serving dish and store them in the refrigerator.
- Please note the truffles contain dairy, so if you do not consume all the truffles during the movie, you will need to store the leftovers in the refrigerator so they don’t spoil. The buttons are also a choking hazard, so make sure to remove them before consuming.
To make the Insect Legs:
Add ¼ cup of chocolate chips and ½ tsp of coconut oil to a microwave-safe dish. Microwave in 15-second increments and stir in between. Chocolate burns easily, so make sure not to cook it for more than 15 seconds at a time.
When the chocolate is melted, add the melted chocolate to your piping bag with a very thin tip. On a parchment-lined baking sheet, pipe out “L” shaped insect legs. Make a bunch because you will need these for the martini in the last scene. It’s also better to play it safe and make extra in case some of them break.
If your chocolate is too runny, wait a few minutes for it to cool a bit and then pipe the legs. When you are done with the legs, place the baking sheet in the freezer so they harden fast.

Just Lemonade
A blissfully easy one to end the movie night! I bought pink lemonade from the grocery store and served that over ice. 😊
